If you use Movavi Screen Recorder or Movavi Video Suite you can set recording time beforehand.
Scheduling feature is available for Movavi Screen Capture 5 for Windows OS, Movavi Video Suite 14, and Movavi Screen Capture 3 for Mac OS.
Scheduled recordings will start with the currently selected capture area, sound, and other options.
1) Before scheduling the recording:
1. Click the Select Capture Area button on the recording panel and select the part of the screen you want to see on your scheduled recording.
2. To enable system sound recording, click the speaker button on the recording panel and make sure it is enabled and highlighted green.
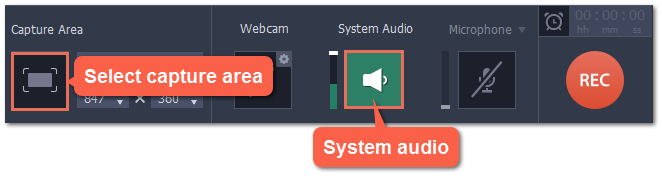
Learn more: Capture area | Sound | Webcam
2) Schedule recording
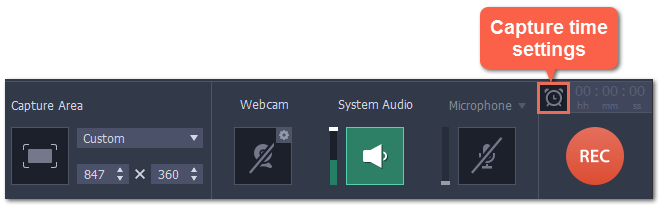
1. On the recording panel, click the alarm clock button  to open capture time settings.
Or open the Settings menu, choose Preferences and switch to the Capture Time tab.
2. Under "Capture time options" select Start and end on schedule.
3. Next to Start time, enter the time and date when you want to start the recording.
4. Next to End after, enter the length of the recording.
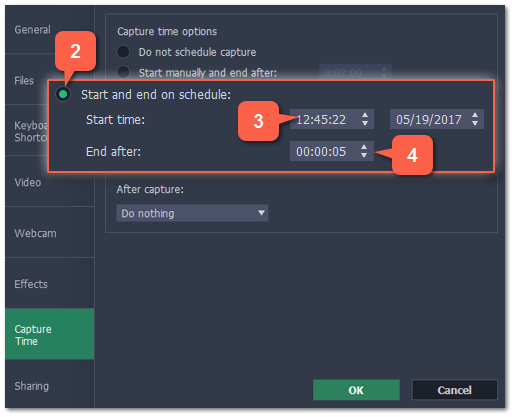
The recording is now set to automatically start and end at the given time.
3) Schedule sleep or shut down (optional)
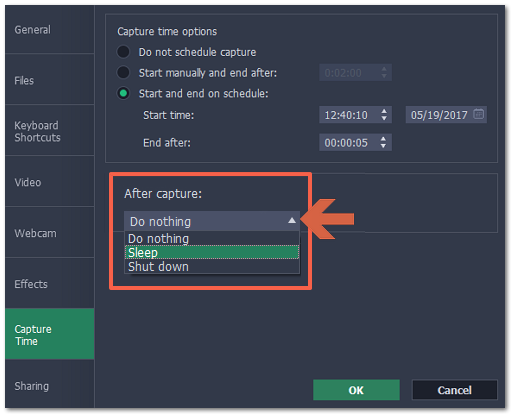
After a scheduled recording, you can set your computer to automatically sleep or shut down to conserve energy.
1. In the Capture Time preferences, open the After capture box.
2. Select Sleep or Shut down.
After the recording is finished, the recording file will be stored in *.MKV format in the output folder with your other screen recordings.